How to use the Acoustic Guitar Bridge Template
V-0672
Dan Erlewine explains the many features of the Acoustic Guitar Bridge Template and shows how helpful this little gauge is when making a bridge from scratch.
Video Transcription
[on-screen text reads: Stewart-MacDonald - StewMac Bridge Template]
Dan Erlewine: In Trade Secrets #187, I showed a shop-made layout tool that I used for making Martin Bridges. It was made of wood and when people started asking about it and wanting us to make it, we did. And we made a few improvements as well.
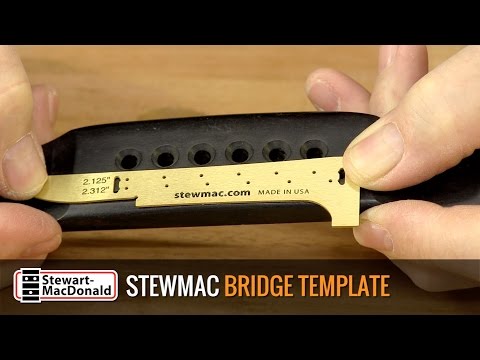
My original tool became this slick brass template, which has all the shapes and measurements needed to make a Martin Bridge. It has the round-over of the back, the arch of the top, and the shape of the wings or feet. Not only that, it has the string spacing layout for both 2 and 1/8 and 2 and 5/16th bridge spacing.
I used the template when I laid out this bridge for this 1941 0017 Martin, the rectangular type. I'll continue to use it as I shape it. I've already roughed it in on the band saw and drilled all the holes, but this comes in handy later as you scrape and file.
It also works for a belly bridge because the curves are all the same. The only difference there being a belly and a rectangle.
Brace your bridge blank
I'll give you some pointers on how to use it. Clamp your bridge blank against another piece of wood. I'm using this little prop that I shape bridges on. The reason for this, is to make ledge to hold the template on real tightly while you trace. These are the bridge wings or feet.
Trace the blank
I like a silver pencil for this. It shows up great on Ebony and Rosewood. There's one and there's two. And the top arch.
I mark the blank on both sides with the template and the bottom with the treble and the bass mark so I know which edge is the front edge of the bridge. Connect to where the wings are on the top of the blank. There's my center line of a six-inch bridge. These marks are five eights of an inch back from the front edge. That's how far back I want the bridge pin holes and these marks are how wide I want the bridge pin holes. Because this is an old bridge, it's going to be 2 and 5/16ths.
Center punch pin holes
There's my center line for the holes. And then I take my template, and looking through the notches on each end, I can tell when I'm on the center line because I can see it and hold it down tight and come in with a scribe [on-screen text reads: Inlay Tracing Scribe from StewMac] and I can center punch where I'll draw these holes. The bridge pin spacing for this guitar is the wider 2 and 5/16th spacing.
Saw, drill and shape the bridge
That blank's ready to make. It's all laid out, ready to saw, drill, and shape. Drill the holes first, otherwise you'd erase your layout work if you did the top first.
So I'm going to go ahead and use this tool to finish the work I'm actually doing here, which is shaping this bridge. And just keep checking that all the curves come in the way I want them. You use it all the way through for the shape and to bring all your lines in.