Setting up a banjo's 5th string: nut, capos and peg
Here’s the way I set up a banjo 5th string for bluegrass players
Tips for the nut, the capos, and a good way to install that 5th string peg
Banjo 5th strings are quirky
There are lots of ways to set up 5th string pegs, nuts and capos, from simple to fancy — and they’re all good. If you’re into bluegrass banjo, then you might like the way I set up the banjos I build. It’s what works for me.
Bone nut vs. railroad spike
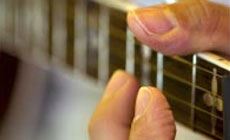
Traditional banjo players don’t fret the 5th string as much as folks playing modern styles. In this case the exact placement of the 5th string nut in relation to the 5th fret isn’t critical. In fact, many early banjos didn’t have a 5th string nut at all! But bluegrass styles need that string to play accurately both open and fretted. That’s why I use the 5th fret as the nut for this string. This photo shows a small bone nut being used to hold the string in position as it passes over the fret. This nut is deeply slotted so it’s only holding the side-to-side position; the string rides up onto the fret for accurate intonation.

My favorite method
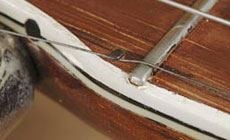
Instead of a nut, the string is held in place by a railroad spike. (They really were created for model trains: miniature spikes to hold rails. The shape is perfect for 5th strings, and they're so tiny they don’t interfere with your playing.)
For capos: railroad spikes
Instead of using a sliding capo, I install railroad spikes at each fret between the 6th and the 11th. I position the spikes dead center between two frets. Many builders place the spikes closer to the fret, but I feel that puts unnecessary tension on the capoed string. The closer the spike is to the fret, the harder it is to push the string under it, and it also makes the pitch sharper.
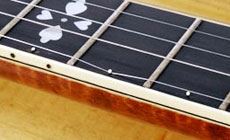
To install a spike, drill an undersized hole and hold the spike with needlenose pliers as you tap it into place. (Our tapered router bit is good for this.) The fit should be tight enough that glue’s not needed; otherwise a drop of super glue might be needed. Don’t put the spike directly under the string; it should be just to the side so you don’t press on it when fretting. The open hook of the spike faces out toward the edge of the fingerboard.
Evolution of the 5th string peg (these are all still in use today)
Wooden friction peg
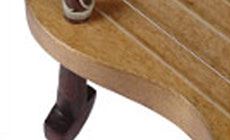
This minstrel banjo has a violin-style peg through the fingerboard. Notice that there’s no nut.
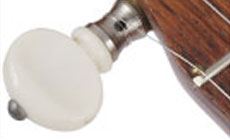
Brass friction peg
TThis non-geared peg press-fits into a tapered hole in the side of the neck. The knob screw keeps it from slipping.
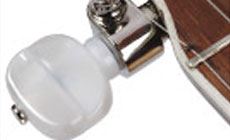
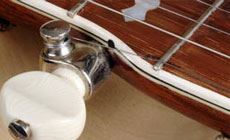
Right angle peg
Herman Kroll came up with this design: a geared tuner with a string post at a 90° angle.
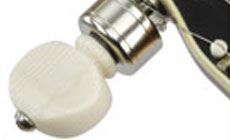
Waverly planetary peg
At the modern end of the evolutionary ladder, this peg houses smooth planetary gearing.
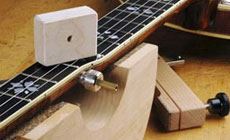
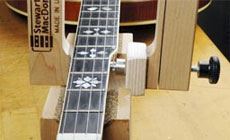
Installing the peg
I use a handheld electric drill to start the hole with a bit that matches the small end of the peg, then I use a 5th peg reamer to shape the hole to fit the tapered peg. Turn the reamer slowly and check your progress so you don’t make the hole too large.
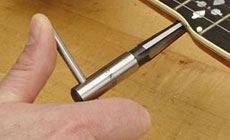
I prefer to press the tuning peg into place instead of hammering it in — it’s more controllable. I use a scrap of wood with a hole through it and a camless clamp. The wood replaces the knob on the tuner post, and the clamp squeezes the peg into place.
(In these two photos I’m demonstrating on a banjo that already has its 5th string in place. Of course that string won’t be there when you’re actually installing the peg.)
Install a right-angle peg so it’s tipped back slightly. The string should meet the post at a right angle.
Ohio / Indiana Bluegrass Banjo Champion
Todd Sams is an instrument builder, and he’s a hot picker, too. Back before Todd got into building, he was performing and taking part in banjo competitions. From the mid-80s through the mid-90s, Todd won the Ohio and Indiana State Championships in Bluegrass Banjo, as well as winning the banjo competition at the Vandalia Gathering in West Virginia. — Editor


